DIY: Cozy Sweater Stockings

Handmade Sweater Knit Stocking

I absolutely love the look of soft cozy knits in the winter. If it were up to me I’d enshroud my entire apartment in knit blankets, rugs, pillows and drapes!

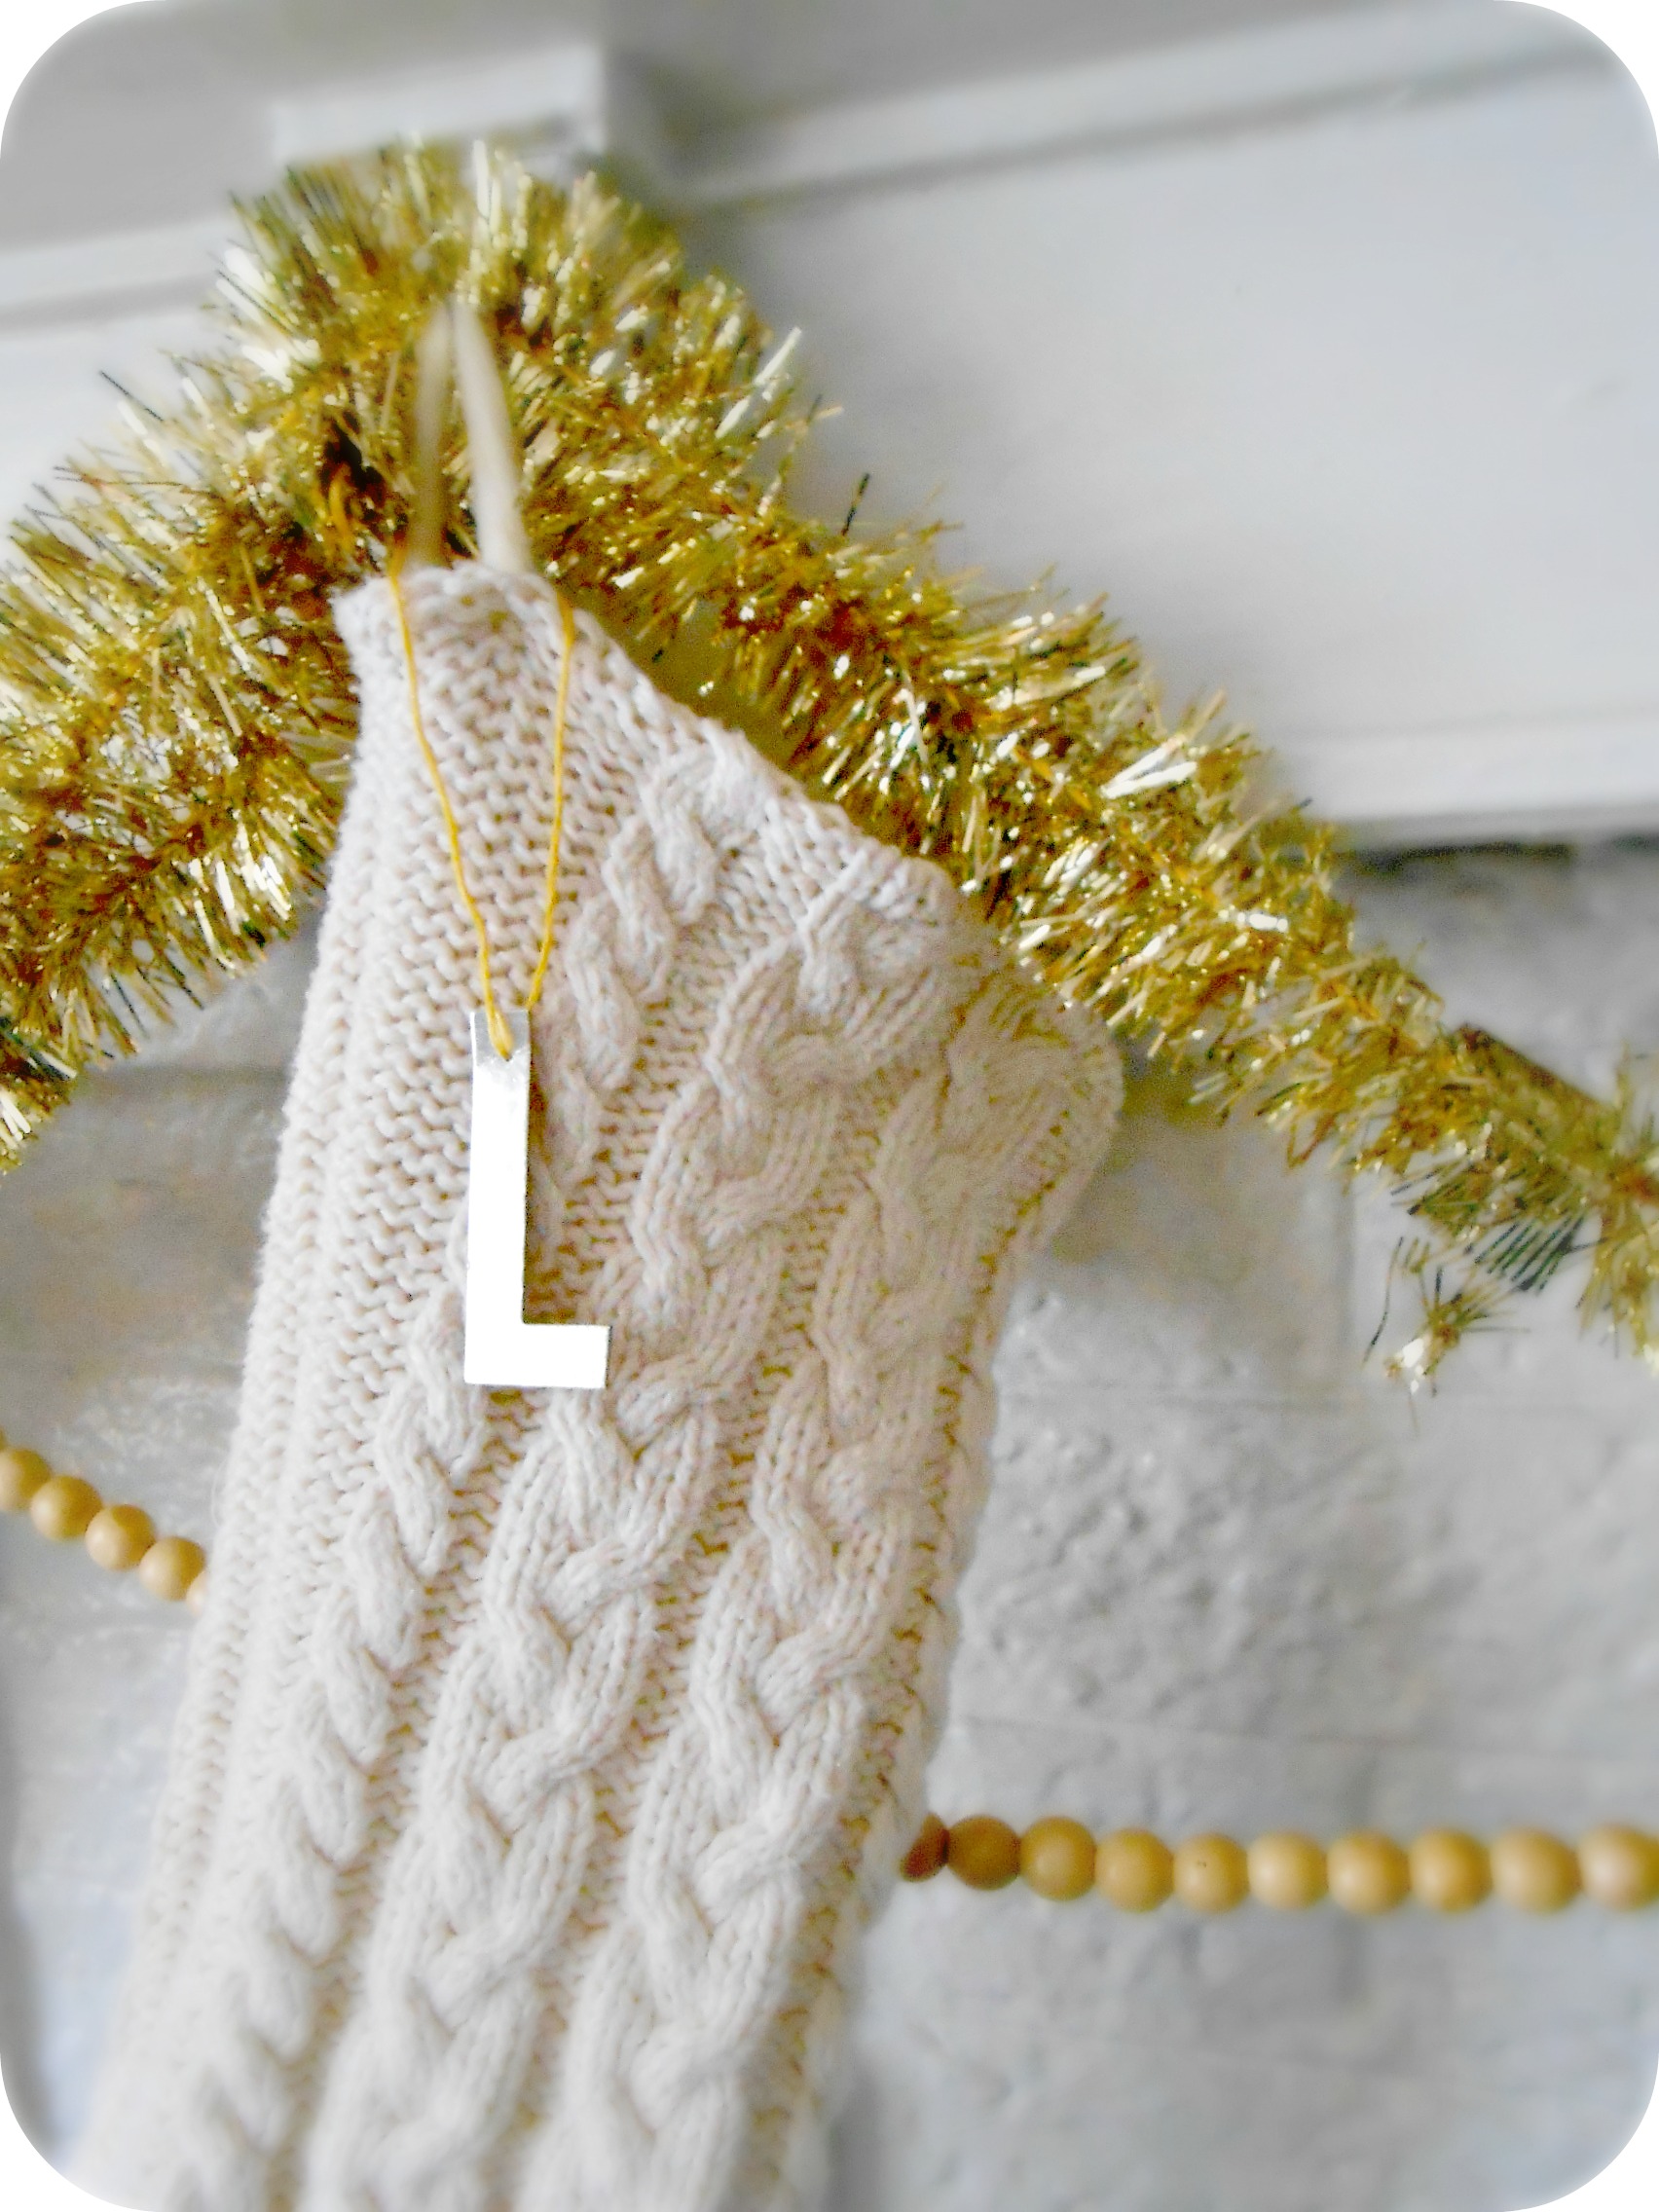
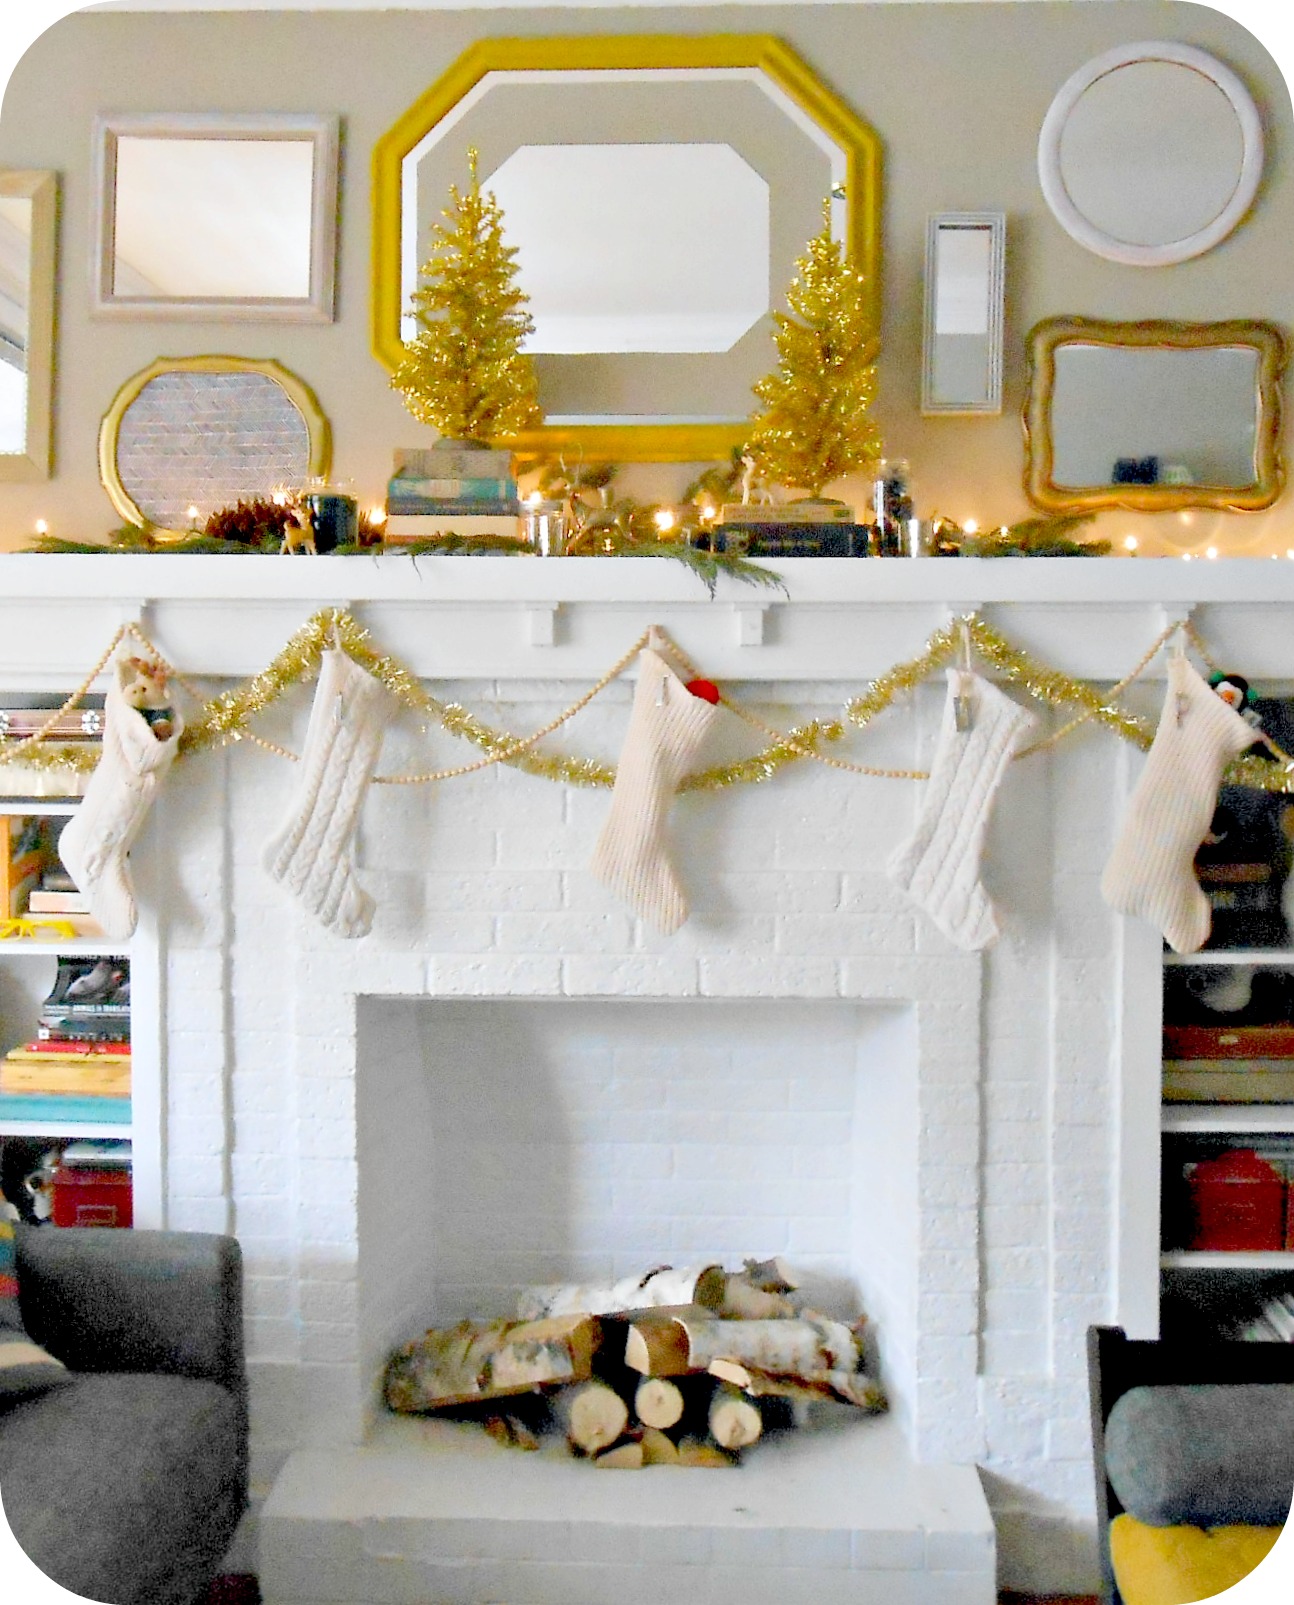
But since that’s not currently possible – I’ve had to satiate my urges to make everything soft and fluffy in a different way. Rather than go out and purchase a set of readymade holiday decor, I decided to handcraft a set of rustic Christmas stockings on my own. Utilizing pre-loved knit men’s sweaters, these elegant and wintery gift socks were quick to make and added just the right amount of cheer to our fireplace mantle. Follow my easy instructions below to craft a set of stocking for your home or to give as a gift to your favorite homebody!

DIY Eco-Friendly Knit Sweater Christmas Stockings

Supplies you’ll need: Sharp fabric scissors, knit sweaters (you’ll get 2 stockings out of 1 sweater), yarn for hanging, white thread, sewing machine, embellishments.

DIY Sweater Christmas Stockings

  1. Gather up your supplies. Think soft, cozy, and creamy colors.
  2. You’ll need a stocking template. I used the one off Martha Stewart’s website as a loose guide.
  3. Cut out the stocking shape using two layers of your sweater fabric.
  4. Bring the two right-facing sides together and stitch along the sides and bottom, leaving the top un-sewn.
  5. Cut 3-4 inches of yarn. Fold the top of the stocking over an inch around the top and pin the yarn on either side of the top back seam (the one that leads to the heel of the stocking).
  6. Sew across the top of the stocking hem using a zig zag stitch. This will keep the top from fraying and separating as you stuff the stocking with presents.
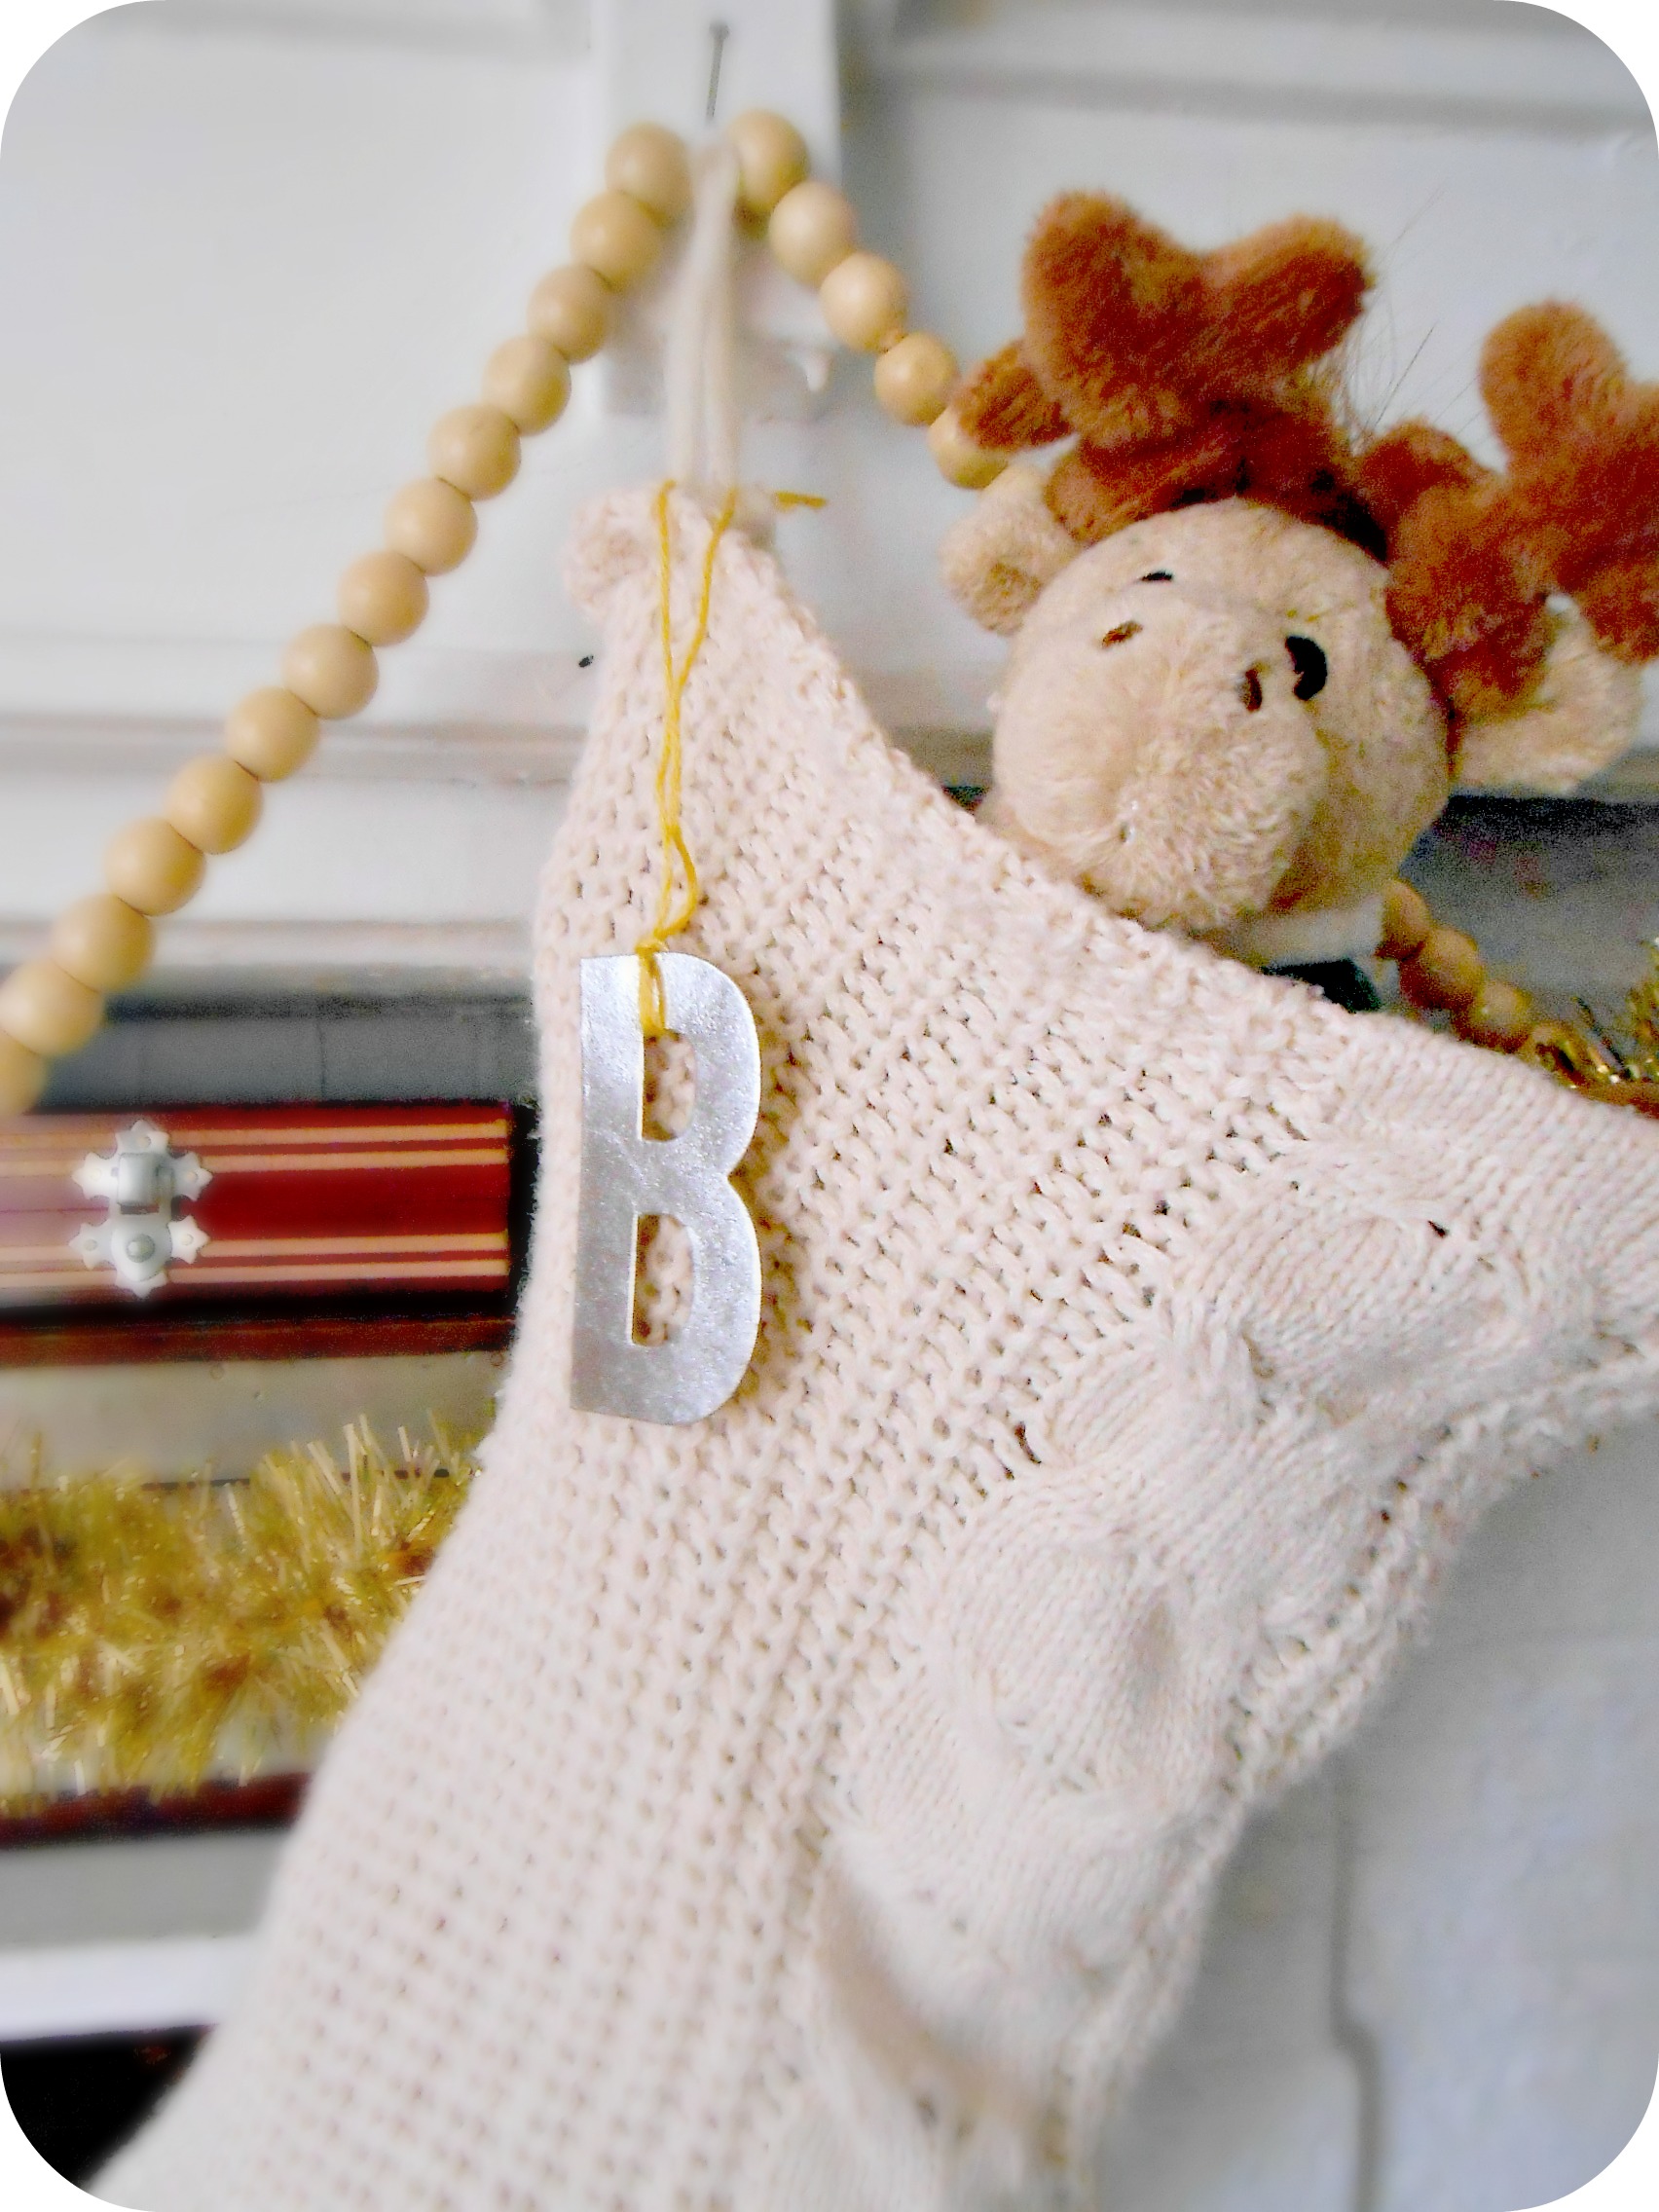
  7. Choose your stocking embellishments. These will add color, texture and spice to your stocking. You may also want to consider using something that will help identify which stocking belongs to which family member.
  8. Hang, fill with presents and enjoy!

DIY Sweater Stocking Eco-Friendly Chrristmas

Advertisement

DIY: Printed Picnic Tray

DIY upcycled serving tray

The sun is shining, a gentle breeze is blowing and you just came home from the farmer’s market. So what do you do? Plan a picnic of course! Some of the basic you’ll need are tasty local treats, a blanket, reusable napkins, utensils – and my secret to picnic success – a sturdy tray!

DIY Picnic Tray from pierogi picnic

Helping to keep your food stable and elevated, while upping your presentation ante, having this simple accessory will make your outdoor dining experience fun and functional. Follow my quick pictorial instructions below Continue reading

An Indie Biz: Photo Magic

Pierogi Picnic: Made in Chicago Clothing & VintageAs I sit at my computer late on a Monday night I realize that I am way way way overdue. Not for returning my library books – but for writing a post on running an indie biz! So here’s my much belated installment – and it’s all about photo editing.

Let’s say you’ve developed a beautiful new line of products and are ready to introduce your creations to the world. You’ve painstakingly planned the shoot, took the time to set up quality lighting and have captured a great set of photos to show the masses.

Now what? 

Don’t even think for a second that once your photos are logged and stored on your SD drive that you’re free to frolic about. Your next task as a handmade business owner is to make those pics magical. And I’m not talking pseudo-well-done they get a passing grade magical. I mean stop-em-in-their-tracks, make-heads-turn, kind of attention. Sure – paying a pro to do the dirty digital work can seem promising – but there’s nothing more fulfilling than empowering yourself to take that DIY step to enhance pictures on your own.

So before I sit back to tackle the 300+ photos I snapped of new Pierogi Picnic gear recently, I’d like to share with you some of my favorite tricks and short cuts for photo editing on the fly. Continue reading

Events: 14 Days of Crafting

14 Days of Crafting from Eco Etsy photo by Lydia Krupinski

The Eco Etsy Street Team is holding our first-ever 14 days of crafting! We’re rounding up the best of the best green tutorials and sharing them with experienced upcyclers and newbie DIYers alike.

Several posts that I’ve written for the team blog from over the years, like the one above, will be featured, along with many other fun ways in which you can get your “craft on” sustainably.

Tune in each day of the challenge to be inspired and take your creativity to a whole new level!

DIY: Lampshade Facelift

Sometimes I get that itch to update things in my place – but I don’t want to be wasteful with my money or resources – so I’m always concocting new ways to make do with what I have.

Most recently I grew tired of the lampshade in our bedroom. It was a sweet embroidered lil’ thing, but the color was fading and the interior was cracking, giving it a not-so-cute shabbiness when turned on. So I rested on the idea of changing it up, allowing my mind to invent some potential ideas. What transpired turned out to be a subtle yet stunning piece that was given new life with a few pages of a vintage dictionary. Here’s how I did it:

1) Using the pages of an old crumbling dictionary (it was the same one I used for the Bibliophile Wreaths for Christmas) I tore out a good handful of pages and cut them into long 1″ slips.

2) Using a glue gun, I affixed each strip to the lampshade, overlapping each slightly. Also, I started on the bottom layer and then worked my way around to the top.

3) The final step is to cut any overly long and crooked strips so they align (not perfectly, but close enough) to all of the others. This will give the effect a more polished look.
And there you go – a quick, inexpensive, easy and eco-friendly way to give a lampshade a new look. You can experiment using other kinds of papers as well, or may even try fray-less fabrics. Once you create one you’ll be tempted to try your hand at more!

Do you have a suggestion on how to update a dull lampshade in your home? Share it in the comments!

Inspiration: New Eco Etsy Series

With the start of the New Year my role on the Eco Etsy team is evolving.

We are doing away with the previous “Eco-Tutorial” series in lieu of daily topics by subject. Imagine what I was given? Inspiration. Perfect! I was so thrilled about the  idea that I spent an hour Saturday collecting thoughts, images, and articles that could encourage, enlighten, or excite. My first post will be debuting tomorrow morning.

Since ardently collecting potential inspirations, I’ve decided to also ‘beef up’ my inspiration series here! So expect to see more outfits, art, and imagery from around the web popping up on the Pierogi Picnic site as well!

And while we’re on the topic – is there something that has inspired you recently? Do you have a favorite blog or website that you turn to regularly to lift your spirit? If you do – please share it in the comments below!