Biodegradable Leaf Wreath

I don’t know about you, but come autumn I’m always itching for some new home decor. It’s not like Christmas, where I want to collect objects for nostalgia’s sake. I want something new each fall and I’m also always eager to concoct a new visage in my nest. But then the flower child within convicts me. How can I justify buying or making something new to add to the pile of stuff already cluttering my apartment, my life, and the planet?

What to do, what to do? Ah-ha! The solution! A biodegradable craft!

20161030_150700

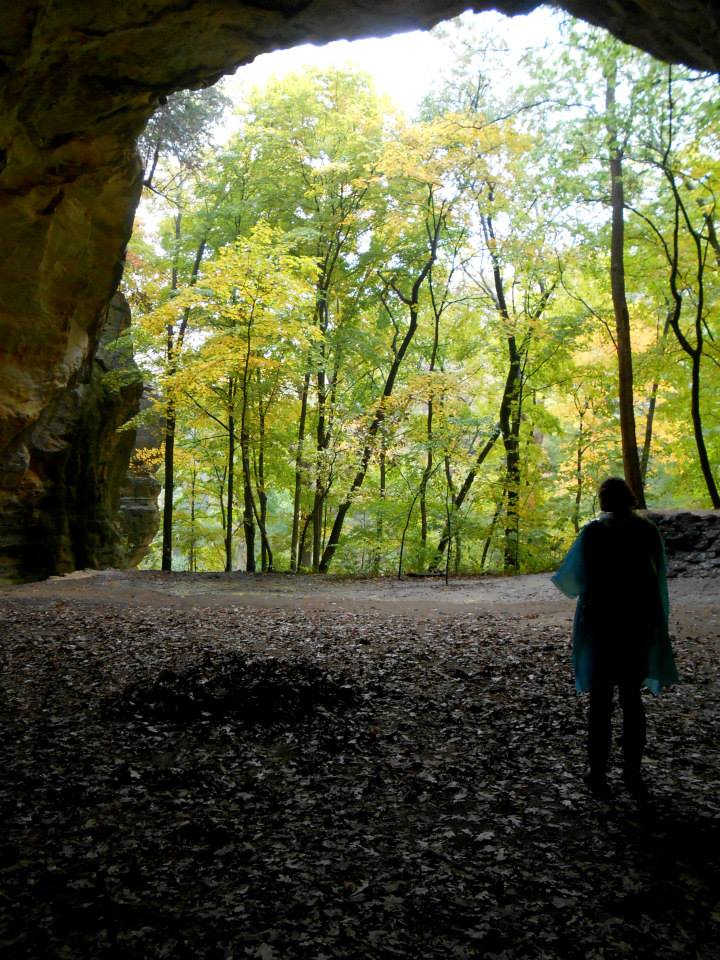
Fall foliage. It’s the thing that makes it a thing, is it not? Without the changing leaves, the sweet smell of decay filling the air, we might as well be approaching spring. Seeing the changing canopies of the city’s trees is what makes me feel electric, feel renewed, feel distracted from the foreboding threat of winter. So why not capture that feeling by collecting the very thing that gives the season its mark: leaves.

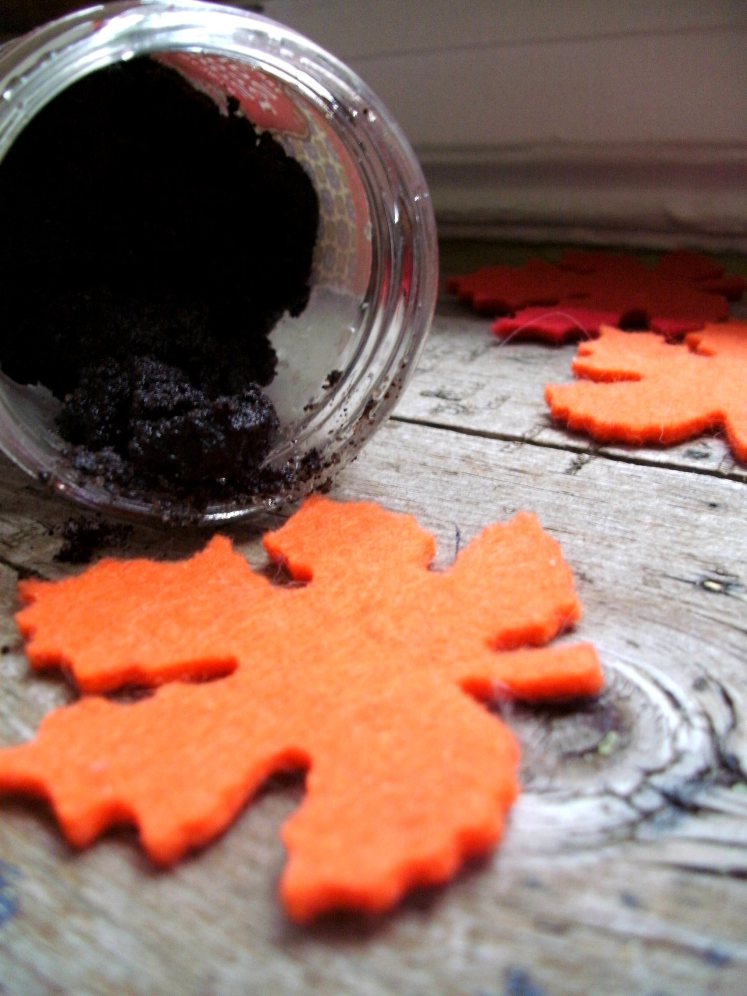
For this project all you’ll need is some non-toxic glue, a pair of scissors, recycled cardboard, and some freshly pressed leaves. A pair of hyper helper hands, should you have a toddler waddling about, is good too!

First things first, you’ll need to cut a semi-accurate circle out of your cardboard. This is the part best saved for those of us old enough to wield a sharp object. Once the main circle has been cut out, shave out an inner circle so you’re left with a big “o.” That’s your wreath. Now, dab on glue around the cardboard, placing your first layer of leaves around the perimeter. Next, you’ll repeat this step, but pop the glue on the leaves. I find that three layers works best.

If you’re a strategic sort you can place the bigger leaves at the base and alternate colors so you have a more aesthetically appealing display. Once complete, allow your wreath at least 24 hours to dry before hanging it up. We took our little creation and hung it on August’s bedroom door using some doubled up washi tape. That lasted all of a single afternoon as he insisted that the door remain as-is. Oh toddlers. So we’re now enjoying it as part of our table centerpiece.

20161016_091229

There you have it! A simple, festively fall, biodegradable wreath that’s easy enough that even a kid, or an overly exuberant pumpkin-spice-latted-up adult, can do it.

Enjoy!

20161030_150654

Advertisement

DIY: Festive Fall Garland

diy upcycled pom pom garland

Pumpkins deep jewel tones and warm hues, spicy candles and cozy fabrics all of these things are what make autumn my favorite season. So when dreaming up a new look for our fireplace mantle, I knew I wanted to combine all my favorite elements of fall into the spread. Pumpkins. Check. Wine colored mums. Check. Now for the finishing touch: a fun upcycled garland.

Pom poms, those delightfully little fluffy balls of yarn, are one of my secret obsessions. I will use any excuse to make a fresh batch – affixing them to gifts, headbands, art prints and more. So when choosing the texture of my festive fall garland the choice was easy.

pom poms

Now when choosing the colors and textures – that’s where a bit of experimentation came into play. Digging through my drawer of varying fabric scraps, I settled on a warm cream linen, rich pumpkin velvet, and grey and lilac t-shirt cottons. I then grabbed a ball of white yarn that had been sitting untouched after a summer project. Cutting, wrapping and slicing I found that the linen frayed too much and didn’t have the fluffy outcome I wanted. The velvet and cottons, however, worked out perfectly!

So without further adieu, I now bring you an tutorial on how you too can make one of these festive pieces for the season. Play with a variety of colors, textures and pom pom sizes to give your garland a twist of your very own.


diy recycled fabric pom pom garland

  1. Lay out your chosen fabric
  2. Cut the fabric into 1/2″ strips
  3. You’ll need 4 strips of fabric per pom pom
  4. Tug both ends of each strip to stretch and fluff them out
  5. Wrap the first strip around four fingers
  6. Wrap each of the remaining strips around the first
  7. Using a shorter excess strip, place the string between the center of your fingers and tie a knot
  8. Pull the pom off your fingers and cut the looped ends
  9. Fluff and trim your pom so all the ends are similar in length
  10. Cut a long piece of yarn onto which you’ll tie your poms
  11. Center each pom along the yarn mapping out the spacing
  12. Tie the yarn across the center of each pom and pull into place

And there you have it! In fifteen minutes or less you can be on your way toward making a festive fall garland of your very own! Should you give the project a try – be sure to share pictures of your final creation with us on Facebook or Instagram!

handmade fabric scrap pom pom garland

Featured Designs: Cycle Sweatshirts Are Back!

pierogi picnic: sir cycle sweatshirt

They’re here – they’re here! The classic Pierogi Picnic sweatshirt is back!

Variations of the Ms Cycle and Sir Cycle design are now back in stock in my Etsy shop for a limited time only. Featuring soft upcycled fleece, a slim cut, a versatile cowl/hoodie combo and elegant detailing, this is one of my all-time favorite creations, and also a best-seller. It makes for a perfect gift for the holidays or even a treat for yourself.

But don’t delay! This design is only available in limited quantities – so if you see one in a size and color you like – snatch it up before the holiday rush makes them all disappear.

ms cycle

Starved Rock Babymoon

Pierogi Picnic: Starved Rock Babymoon

Things have been really quiet on the Pierogi Picnic website as of late as we eagerly prepare for the arrival of our very first little bundle. Between battling all-day-sickness, doctors visits, and nesting, we’ve been quite the busy bees these last six months – which is exactly why it was high-time to get away and recharge. So this past weekend David and I embarked on a low-key babymoon.

Pierogi Picnic: Starved Rock BabymoonWhat’s a babymoon? It’s the latest trend in pregnancy, encouraging the parents-to-be to get away one final time as a twosome before the babe’s arrival. When planning our getaway we knew we wanted it to be as close to home as possible, while still allowing ourselves to be immersed in nature and the outdoors. And with it being October – camping was off the list – so the choice was easy: Starved Rock State Park.

Nestled between miles of farmland and the Illinois River, Starved Rock was the perfect place for us to get out for some fresh air while disconnecting from all the hub-bub of home. Less than a two hour drive from Chicago, this picturesque preserve was one of the nation’s first sanctioned national parks, adding a rich history to the already spectacular forests and cliffs of the region.

Pierogi Picnic: Starved Rock BabymoonWith the confetti like fall foliage, deep earthy smells, serene visage and winding trails, we were able to hike all our anxieties about the coming bebe away. Having the opportunity to slow down and reflect on this coming new chapter, all while surrounded by the gold and amber hues of the changing season, was the best possible way for us to celebrate and prepare for our little human.

So should you be in Chicago, and looking for a way to at once connect with nature and unwind, let me be the first to recommend Starved Rock and all its glory. You won’t be disappointed!

Pierogi Picnic: Starved Rock Babymoon

DIY: Peppermint Mocha Body Scrub

SANYO DIGITAL CAMERA

It’s the time of year when we turn off the air, bust open the windows, and let the cool breeze of autumn whip through our homes. Forget spring cleaning – fall is when I want things to be light and fresh – which is exactly what has inspired my classic homemade Peppermint Mocha Body Scrub.

Made with ingredients from the kitchen, the exfoliating texture and delicious smell of this DIY treatment will transform your bathroom into a foodie spa extravaganza. Unlike the fattening espresso drink of the same name at Starbucks – this luxurious scrub is actually good for you! Made with olive oil, coffee grounds and effervescent peppermint, it will awaken your senses while sloughing off dry dull skin.

Follow the recipe to see how easy it is to indulge!

Ingredients:1 cup used coffee grounds, 1/2 cup raw sugar, 2 tablespoons olive oil, 10 drops peppermint oil, 1 teaspoon cocoa

To make, combine the coffee grounds and sugar in a small bowl and stir together. Next, add the two oils to the coffee sugar brew. Once you have thoroughly mixed the oils in, add the teaspoon of cocoa to give it an extra kick of scent. Pour your concoction into a cleaned out jam jar. For gifting purposes, wrap a string of ribbon or raffia around the base and tie in a bow. Will stay good in open air for two weeks – or you can refrigerate it to extend the shelf life.

Enjoy!

Featured Designs: Welcoming Fall

This morning I awoke to a crisp cool breeze wafting in through the open windows. Fall is almost here! And with the changing season comes the promise of foliage, pumpkin this-and-tha’s, chunky knits and more. In honor of this most cozy of seasons, I’ve put together the following collection of my favorite autumnal Pierogi Picnic designs. Jump in and enjoy!

Welcoming Fall1. Limited Edition Dawn & Dusk Peter Pan Collar Sweatshirt

2. Limited Edition Dawn & Dusk Studded Tee

3. Perfect Gent Upcycled Bow Tie

4. Limited Edition Heart on Your Sleeve Dawn & Dusk Top

5. Flirty Flounce Pumpkin Spice Top

6. Peek a Boo Chevron Cardigan

7. Golden Gal Party Dress

8. Limited Edition Dawn & Dusk Lace Cowl Top

9. Turkeypalooza Men’s Smash Shirt

Greening Martha: Eco Chic Autumn Table Runner

DIY Eco-Friendly Leaf Table Runner for Thanksgiving

There are so many incredible DIY craft tutorials out there to try – but how do we scratch that creative itch without compromising our earth-loving-ethics? That’s what the “Greening Martha” series is all about! I take some of the most lusted after Martha Stewart tutorials and give them an eco-friendly makeover, making you feel better about indulging your crafty cravings!

With Thanksgiving just around the corner, I thought it was high-time to get some seasonal tutorials going. This month I’m bringing you a DIY twist for dressing up your holiday table: the Eco-Chic Autumn Table Runner.

Designed after Martha’s “Festive Fall Felt Trivets“, my rendition of this uber cute seasonal decor utilizes leftover fabric scraps from sweatshirts and t-shirts instead of virgin materials. By using textiles that you already have lying about your home you can spice up your Thanksgiving spread without purchasing new fabric, which wastes valuable resources and pollutes the environment.

For an in-depth account of the full effects of the textile industry, read this report from the Indian Textile Journal, which documents each step of the fabric creation process and its impact on the planet.

So in the true spirit of  the “Greening Martha” series, here’s a fun eco-friendly tutorial that will have you jumping for joy with your Thanksgiving table design, while feeling good about your conscious craft choices.

Greening Martha eco-friendly leaf table runner

Eco Chic Autumn Table Runner

Supplies Needed:

+ Various fabric scraps or used t-shirts, sweatshirt and other textiles
+ A sharp pair of fabric scissors
+ Fabric chalk, marker, pencil or crayon
+ A leaf (go get one from outside!)
+ A threaded sewing machine or old fashioned needle and thread

  1. Gather up your fabric, paying particular attention to the color scheme. Warm, earthy autumnal tones are best. Also try to find a variety of fabrics to create a more rustic look. Think cotton, knits, fleeces and other cozy textures.
  2. Grab your leaf and set it down on your first piece of fabric.
  3. Outline the leaf’s shape using fabric chalk, a marker, crayon, or anything else you may have lying around.
  4. Cutout your leaf outline – doubling the fabric if you want to be extra efficient.
  5. Trim up your leaf cutout to ensure it’s look even sharp.
  6. Repeat steps 2-5 with your other fabrics.
  7. Once all your leaf shaped are cut out, set your sewing machine to a zig zag stitch pattern. If you’re stitching by hand – skip this step.
  8. One leaf at a time, stitch across the surface of the shape, lining up your next leaf just after you hit the edge. Alternate the orientations of the leaves with each new shape addition to ensure a more natural pattern.

DIY Green Tutorial: Thanksgiving Leaf Table Runner

 
And that’s it! In fifteen minutes or less you can have an eco-savvy, super chic table runner with which to adorn your Thanksgiving spread. It’s an easy, affordable, and of course, earth-friendly way to liven up your space without compromising your ethics.

Is there a sustainable how-to that’s caught your eyes for the holidays? If so – share the link in the comments below!

greening martha diy eco table runner